What is a Float Switch?
A float switch, also known as a level switch, is a device that detects the level of liquid in a container and triggers a switch when the level reaches a predetermined point. It consists of a floating object, usually a ball or cylinder, attached to a switch mechanism. As the liquid level rises or falls, the float moves with it, activating or deactivating the switch.
Float switches come in various types, including:
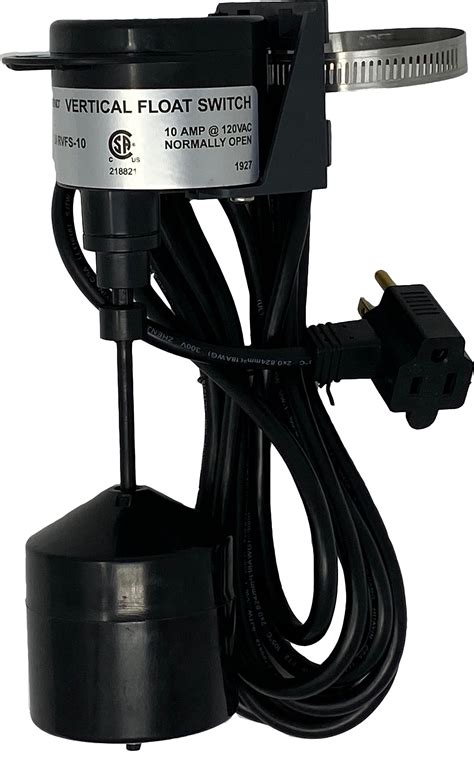
- Vertical float switches
- Horizontal float switches
- Magnetic float switches
- Optical float switches
Each type has its own advantages and disadvantages, depending on the application and the environment in which it will be used.
How Does a Float Switch Work?
The basic principle behind a float switch is simple: as the liquid level rises, the float rises with it, and when it reaches a certain point, it activates a switch. The switch can be used to turn on or off a pump, trigger an alarm, or perform any other desired action.
Here’s a step-by-step explanation of how a typical float switch works:
- The float is positioned at a predetermined level in the container.
- As the liquid level rises, the float rises with it.
- When the float reaches a certain point, it activates a switch.
- The switch can be used to turn on a pump, trigger an alarm, or perform any other desired action.
- As the liquid level falls, the float falls with it, deactivating the switch.
The exact mechanism by which the float activates the switch can vary depending on the type of float switch. For example, a vertical float switch uses a rod attached to the float, which pushes against a microswitch as the float rises. A magnetic float switch, on the other hand, uses a magnet attached to the float, which triggers a reed switch when it comes close enough.

Applications of Float Switches
Float switches have a wide range of applications across various industries, including:
Water and Wastewater Treatment
In water and wastewater treatment plants, float switches are used to control the level of water in tanks, wells, and other containers. They can be used to turn pumps on and off, trigger alarms when the water level gets too high or too low, and control other equipment such as valves and blowers.
Agriculture and Irrigation
Float switches are used in agriculture and irrigation to control the level of water in tanks, ponds, and other containers. They can be used to turn pumps on and off, ensuring that crops receive the right amount of water and preventing overwatering or underwatering.
Aquariums and Hydroponics
In aquariums and hydroponic systems, float switches are used to control the level of water in tanks and reservoirs. They can be used to turn pumps on and off, ensuring that the water level remains constant and preventing overflow or underflow.
Industrial Processes
Float switches are used in a wide range of industrial processes, including oil and gas production, chemical processing, and food and beverage manufacturing. They can be used to control the level of liquids in tanks, reactors, and other containers, as well as to trigger alarms and shut down equipment in case of emergencies.

Making Your Own Float Switch
Making your own float switch is a relatively simple process that can be done with readily available materials. Here’s what you’ll need:
- A float (such as a plastic ball or a piece of foam)
- A switch (such as a microswitch or a reed switch)
- A rod or a magnet (depending on the type of switch you’re using)
- Wires and connectors
- A container to hold the liquid
- Tools (such as pliers, wire cutters, and a drill)
Here’s a step-by-step guide to making your own float switch:
- Choose a float and a switch that are appropriate for your application. Make sure the float is buoyant enough to float on the liquid and the switch is rated for the voltage and current you’ll be using.
- Attach the switch to the container using screws or adhesive. Make sure it’s positioned at the desired level for triggering the switch.
- Attach the rod or magnet to the float using adhesive or by drilling a hole and inserting it.
- Connect the wires to the switch and to the device you want to control (such as a pump or an alarm).
- Test the float switch by filling the container with liquid and observing whether the switch triggers at the desired level.
Here’s a table summarizing the materials and tools you’ll need:
| Materials | Tools |
|---|---|
| Float | Pliers |
| Switch | Wire cutters |
| Rod or magnet | Drill |
| Wires and connectors | Screwdriver |
| Container | Adhesive |

Troubleshooting Your DIY Float Switch
If your DIY float switch isn’t working properly, here are some common issues and how to troubleshoot them:
The switch isn’t triggering
- Check that the float is moving freely and isn’t stuck.
- Make sure the rod or magnet is attached securely to the float.
- Check that the switch is positioned correctly and is making contact with the rod or magnet.
- Test the switch with a multimeter to ensure it’s working properly.
The switch is triggering at the wrong level
- Adjust the position of the switch or the length of the rod.
- Make sure the float is buoyant enough to float on the liquid.
- Check that the container is level and the liquid is not sloshing around.
The switch is chattering or rapidly turning on and off
- Add a small amount of hysteresis to the switch by slightly adjusting its position.
- Use a switch with a built-in hysteresis or time delay.
- Add a capacitor or resistor to the circuit to dampen the signal.
Frequently Asked Questions (FAQ)
Q: What is the difference between a normally open and normally closed float switch?
A: A normally open (NO) float switch is open when the float is down and closes when the float rises. A normally closed (NC) float switch is closed when the float is down and opens when the float rises.
Q: Can I use a float switch with corrosive liquids?
A: Yes, but you’ll need to choose a float and switch that are compatible with the liquid. Some materials, such as stainless steel or certain plastics, are more resistant to corrosion than others.
Q: How do I choose the right size float for my application?
A: The size of the float depends on the density of the liquid and the amount of buoyancy needed to activate the switch. In general, a larger float will provide more buoyancy and be more stable in turbulent conditions.
Q: Can I use a float switch to control a high-voltage device?
A: It’s not recommended to use a DIY float switch to control high-voltage devices. For safety reasons, it’s best to use a commercially available float switch that is rated for the voltage and current you’ll be using.
Q: How do I maintain my DIY float switch?
A: To maintain your DIY float switch, periodically check for signs of wear or corrosion, clean the float and switch with a soft brush or cloth, and test the switch to ensure it’s working properly. If the switch or float becomes damaged, replace them promptly to avoid malfunctions.
Conclusion
Float switches are a simple yet versatile component that can be used in a wide range of applications involving liquid level control. By understanding how they work and how to make your own, you can create customized solutions for your specific needs.
When making your own float switch, be sure to choose appropriate materials and follow safety guidelines, especially when working with electrical components. With a little know-how and some basic tools, you can create a reliable and effective float switch that will serve you well for years to come.
No responses yet