Table of Contents
- Introduction to Raspberry Pi Zero W
- Setting Up Your Raspberry Pi Zero W
- Beginner-Level Projects
- Pi Zero W Digital Photo Frame
- Pi Zero W Retro Gaming Console
- Pi Zero W Web Server
- Intermediate-Level Projects
- Pi Zero W Smart Home Hub
- Pi Zero W Network Ad-Blocker
- Pi Zero W Weather Station
- Advanced-Level Projects
- Pi Zero W Drone Controller
- Pi Zero W Facial Recognition System
- Pi Zero W Autonomous Robot
- Conclusion
- Frequently Asked Questions (FAQ)
Introduction to Raspberry Pi Zero W
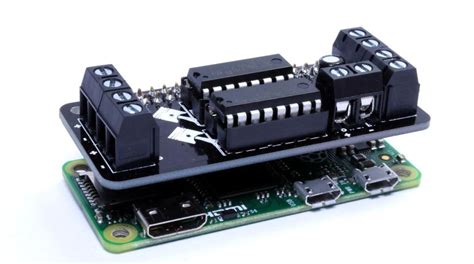
The Raspberry Pi Zero W is a small, single-board computer that measures just 65mm x 30mm x 5mm and weighs only 9 grams. Despite its small size, the Pi Zero W packs a powerful punch with its 1GHz single-core CPU, 512MB RAM, and built-in wireless connectivity. It also features a mini HDMI port, a micro USB OTG port, and a micro USB power input.
The Pi Zero W runs on the Raspbian operating system, which is based on Debian Linux and optimized for the Raspberry Pi hardware. This means that you can use the Pi Zero W for a wide range of applications, from simple projects like building a digital photo frame to more complex ones like creating an autonomous robot.

Setting Up Your Raspberry Pi Zero W
Before you can start working on any Raspberry Pi Zero W projects, you need to set up your device. Here’s a step-by-step guide to getting started:
-
Gather the necessary components: You will need a Raspberry Pi Zero W, a micro SD card (at least 8GB), a micro USB to USB adapter, a mini HDMI to HDMI adapter, a USB keyboard and mouse, and a power supply (5V/2A).
-
Download and install the Raspbian operating system: Download the latest version of Raspbian from the official Raspberry Pi website and install it on your micro SD card using a tool like Etcher.
-
Connect the peripherals: Insert the micro SD card into your Pi Zero W, connect the keyboard and mouse using the micro USB to USB adapter, and connect the mini HDMI to HDMI adapter to your monitor or TV.
-
Power up your Pi Zero W: Connect the power supply to your Pi Zero W using the micro USB power input. Your device should boot up and display the Raspbian desktop.
-
Configure your settings: Follow the on-screen instructions to configure your language, time zone, and Wi-Fi settings.
Once you have completed these steps, your Raspberry Pi Zero W is ready to use, and you can start working on your projects.

Beginner-Level Projects
Pi Zero W Digital Photo Frame
A digital photo frame is a great beginner-level project that allows you to display your favorite photos on a screen. With the Pi Zero W, you can create a wireless digital photo frame that can be updated remotely.
Materials Needed
- Raspberry Pi Zero W
- Micro SD card (at least 8GB)
- Photo frame with a screen (or a separate screen)
- USB power supply
- Wi-Fi connection
Steps
- Set up your Raspberry Pi Zero W as described in the previous section.
- Install the necessary software packages, including the Python Imaging Library (PIL) and the Flask web framework.
- Create a folder on your Pi Zero W to store your photos.
- Write a Python script that uses PIL to display the photos on the screen in a slideshow format.
- Use Flask to create a simple web interface that allows you to upload new photos to the Pi Zero W remotely.
- Connect your Pi Zero W to the photo frame or screen and power it up.
Your wireless digital photo frame is now ready to use. You can update the photos displayed on the frame by uploading new ones through the web interface.
Pi Zero W Retro Gaming Console
The Pi Zero W is an excellent choice for building a retro gaming console due to its small size and low power consumption. You can use emulation software like RetroPie to run classic video games from various consoles, such as the Nintendo Entertainment System (NES), Super Nintendo Entertainment System (SNES), and Sega Genesis.
Materials Needed
- Raspberry Pi Zero W
- Micro SD card (at least 8GB)
- USB gamepad or controller
- HDMI cable
- USB power supply
- Wi-Fi connection
Steps
- Set up your Raspberry Pi Zero W as described in the previous section.
- Download and install RetroPie on your micro SD card.
- Connect your USB gamepad or controller to the Pi Zero W using the micro USB to USB adapter.
- Connect your Pi Zero W to your TV or monitor using the HDMI cable.
- Power up your Pi Zero W and follow the on-screen instructions to configure your controller and set up your gaming console.
- Transfer your favorite classic video game ROMs to the Pi Zero W using the built-in Wi-Fi connection.
Your retro gaming console is now ready to play. You can enjoy your favorite classic video games on a compact and portable device.
Pi Zero W Web Server
The Pi Zero W can also be used to set up a low-power web server for hosting websites, web applications, or personal cloud storage.
Materials Needed
- Raspberry Pi Zero W
- Micro SD card (at least 8GB)
- USB power supply
- Wi-Fi connection
Steps
- Set up your Raspberry Pi Zero W as described in the previous section.
- Install the necessary software packages, including the Apache web server, PHP, and MySQL (if needed).
- Configure your web server settings, such as the document root and port number.
- Create your website or web application files and place them in the appropriate directory on your Pi Zero W.
- Set up port forwarding on your router to allow external access to your web server (optional).
- Access your website or web application using the Pi Zero W’s IP address or domain name.
Your low-power web server is now up and running. You can use it to host personal websites, web applications, or even set up a personal cloud storage solution.

Intermediate-Level Projects
Pi Zero W Smart Home Hub
With the rise of smart home devices, the Pi Zero W can be used to create a centralized hub for controlling and automating various aspects of your home.
Materials Needed
- Raspberry Pi Zero W
- Micro SD card (at least 8GB)
- USB power supply
- Wi-Fi connection
- Compatible smart home devices (e.g., smart lights, smart plugs, sensors)
Steps
- Set up your Raspberry Pi Zero W as described in the previous section.
- Install the necessary software packages, such as Home Assistant or OpenHAB.
- Configure your smart home devices and integrate them with your chosen software platform.
- Set up automation rules and scenes based on your preferences and requirements.
- Access and control your smart home devices through the web interface or mobile app provided by your chosen software platform.
Your Pi Zero W smart home hub is now ready to manage and automate your connected devices. You can create custom automation rules, monitor your home’s energy consumption, and control your devices remotely.
Pi Zero W Network Ad-Blocker
Advertisements can be annoying and intrusive, especially when browsing the web. You can use the Pi Zero W to create a network-wide ad-blocker that filters out advertisements for all devices connected to your network.
Materials Needed
- Raspberry Pi Zero W
- Micro SD card (at least 8GB)
- USB power supply
- Wi-Fi connection
- Ethernet cable (optional)
Steps
- Set up your Raspberry Pi Zero W as described in the previous section.
- Install the necessary software packages, such as Pi-hole or AdGuard Home.
- Configure your network devices to use the Pi Zero W as their DNS server.
- Customize your ad-blocking settings and whitelists as needed.
- Enjoy ad-free browsing on all devices connected to your network.
Your network-wide ad-blocker is now up and running. You can monitor blocked ads, update your whitelists, and enjoy a cleaner browsing experience across all your devices.
Pi Zero W Weather Station
A weather station is a great way to monitor local weather conditions and collect data for analysis. With the Pi Zero W and some sensors, you can create a low-cost, internet-connected weather station.
Materials Needed
- Raspberry Pi Zero W
- Micro SD card (at least 8GB)
- USB power supply
- Wi-Fi connection
- Weather sensors (e.g., temperature, humidity, barometric pressure)
- Weatherproof enclosure
Steps
- Set up your Raspberry Pi Zero W as described in the previous section.
- Connect your weather sensors to the Pi Zero W using the appropriate interfaces (e.g., GPIO pins, I2C, SPI).
- Install the necessary software packages, such as the Python libraries for your sensors and a database for storing weather data.
- Write a Python script to read data from the sensors and store it in the database.
- Set up a web interface or use an existing weather station software package to display the collected data.
- Place your Pi Zero W and sensors in a weatherproof enclosure and mount it in a suitable location.
Your Pi Zero W weather station is now ready to collect and display local weather data. You can access the data remotely, analyze trends, and even share your findings with others.
Advanced-Level Projects
Pi Zero W Drone Controller
Drones have become increasingly popular for aerial photography, videography, and even racing. You can use the Pi Zero W to create a custom drone controller with advanced features and capabilities.
Materials Needed
- Raspberry Pi Zero W
- Micro SD card (at least 8GB)
- USB power supply
- Wi-Fi connection
- Compatible drone (e.g., Parrot Bebop, DJI Ryze Tello)
- Gamepad or joystick for control
Steps
- Set up your Raspberry Pi Zero W as described in the previous section.
- Install the necessary software packages, such as the Python libraries for your chosen drone and the GPIO library for interfacing with the gamepad or joystick.
- Write a Python script to establish a connection between the Pi Zero W and the drone, and to map the gamepad or joystick inputs to the drone’s controls.
- Set up a video streaming solution to view the drone’s camera feed on the Pi Zero W or another device.
- Test your custom drone controller and fine-tune the controls as needed.
Your Pi Zero W drone controller is now ready for use. You can enjoy advanced features, customizable controls, and real-time video streaming from your drone.
Pi Zero W Facial Recognition System
Facial recognition technology has numerous applications, from security systems to personalized experiences. With the Pi Zero W and a camera module, you can create a facial recognition system that can identify and authenticate individuals.
Materials Needed
- Raspberry Pi Zero W
- Micro SD card (at least 8GB)
- USB power supply
- Wi-Fi connection
- Raspberry Pi Camera Module or USB webcam
- Facial recognition software (e.g., OpenCV, dlib)
Steps
- Set up your Raspberry Pi Zero W as described in the previous section.
- Connect your camera module or USB webcam to the Pi Zero W.
- Install the necessary software packages, such as OpenCV and dlib, and their Python bindings.
- Train your facial recognition model using a dataset of known faces.
- Write a Python script to capture video from the camera, detect faces in the video stream, and compare them against the known faces in your trained model.
- Implement an action or notification system based on the results of the facial recognition (e.g., unlocking a door, sending an alert).
Your Pi Zero W facial recognition system is now ready to identify and authenticate individuals. You can use it for various applications, such as home security, attendance tracking, or personalized experiences.
Pi Zero W Autonomous Robot
Autonomous robots are capable of performing tasks and navigating environments without human intervention. With the Pi Zero W and some additional components, you can create a small autonomous robot that can explore its surroundings and avoid obstacles.
Materials Needed
- Raspberry Pi Zero W
- Micro SD card (at least 8GB)
- USB power supply
- Wi-Fi connection
- Robot chassis and motors
- Motor controller (e.g., L298N)
- Ultrasonic sensors for obstacle detection
- Battery pack for power
Steps
- Set up your Raspberry Pi Zero W as described in the previous section.
- Assemble your robot chassis and mount the motors, motor controller, and ultrasonic sensors.
- Connect the motor controller and ultrasonic sensors to the Pi Zero W’s GPIO pins.
- Install the necessary software packages, such as the Python libraries for the GPIO and the motor controller.
- Write a Python script to control the motors based on the readings from the ultrasonic sensors, implementing obstacle avoidance algorithms.
- Power your robot using the battery pack and test its autonomous navigation capabilities.
Your Pi Zero W autonomous robot is now ready to explore its environment and avoid obstacles. You can further enhance its capabilities by adding more sensors, implementing mapping and localization algorithms, or enabling remote control via Wi-Fi.
Conclusion
The Raspberry Pi Zero W is an incredibly versatile and powerful single-board computer that enables you to create a wide range of projects, from simple beginner-level projects to advanced and complex ones. With its built-in wireless connectivity, compact size, and low power consumption, the Pi Zero W is an ideal choice for many applications, including digital photo frames, retro gaming consoles, smart home hubs, weather stations, drone controllers, facial recognition systems, and autonomous robots.
By following the steps outlined in this comprehensive guide and exploring the various projects, you can develop your skills and knowledge in programming, electronics, and system integration. As you gain more experience, you can create even more innovative and exciting projects using the Raspberry Pi Zero W.
Remember to always refer to official documentation, online resources, and community forums for additional support and inspiration. Happy tinkering!
Frequently Asked Questions (FAQ)
-
What is the difference between the Raspberry Pi Zero and the Raspberry Pi Zero W?
The main difference between the Raspberry Pi Zero and the Pi Zero W is that the latter comes with built-in Wi-Fi and Bluetooth connectivity, while the former does not. This makes the Pi Zero W more suitable for projects that require wireless communication. -
Can I use the Raspberry Pi Zero W for commercial projects?
Yes, you can use the Raspberry Pi Zero W for commercial projects. However, you should always ensure that you comply with the terms and conditions of the Raspberry Pi Foundation and any third-party software or hardware components you use in your projects. -
How do I update the software on my Raspberry Pi Zero W?
To update the software on your Raspberry Pi Zero W, you can use the built-in package manager, apt. Open a terminal and run the following commands:
sudo apt update

   sudo apt upgrade
This will update your package list and upgrade any installed packages to their latest versions. -
What programming languages can I use on the Raspberry Pi Zero W?
The Raspberry Pi Zero W supports a wide range of programming languages, including Python, C/C++, Java, and more. Python is particularly popular among the Raspberry Pi community due to its simplicity and extensive library support. -
Can I connect multiple sensors and components to the Raspberry Pi Zero W?
Yes, you can connect multiple sensors and components to the Raspberry Pi Zero W using its GPIO (General-Purpose Input/Output) pins. However, you should be mindful of the current limitations and ensure that you do not exceed the maximum current draw of the Pi Zero W. You can use a separate power supply or a voltage regulator to power more demanding components.
No responses yet