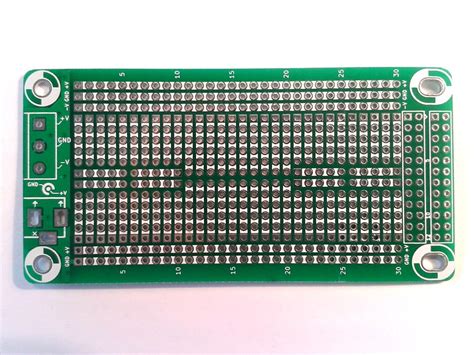
Introduction to Breadboard-to-PCB Transition
Prototyping electronics projects on breadboards is a common practice among hobbyists and engineers alike. Breadboards provide a quick and easy way to test and iterate on circuit designs without the need for soldering. However, once a project has been validated on a breadboard, the next step is often to create a more permanent solution in the form of a printed circuit board (PCB). This guide will walk you through the process of transitioning from a breadboard prototype to a fully-fledged PCB product.
Understanding the Differences Between Breadboards and PCBs
Before diving into the process of converting a breadboard prototype to a PCB, it’s important to understand the key differences between the two:
| Characteristic | Breadboard | PCB |
|---|---|---|
| Reusability | Highly reusable | Single-use (typically) |
| Durability | Low durability | High durability |
| Connection | Friction-based | Soldered |
| Size | Larger | Compact |
| Aesthetics | Prototyping look | Professional appearance |
Breadboards are designed for temporary prototyping, while PCBs are meant for permanent installations. PCBs offer improved durability, reliability, and a more professional appearance compared to breadboards.
Steps to Convert a Breadboard Prototype to a PCB
Step 1: Finalize and Document Your Breadboard Design
Before transitioning to a PCB, ensure that your breadboard prototype is fully functional and meets your project requirements. Document your circuit schematic, component list, and any necessary calculations or design notes. This documentation will serve as a reference throughout the PCB design process.
Step 2: Choose a PCB Design Software
There are numerous PCB design software options available, ranging from free, open-source tools to professional, paid software suites. Some popular choices include:
- KiCad (free and open-source)
- EAGLE (free for non-commercial use, paid versions available)
- Altium Designer (paid, professional-grade)
- Autodesk EAGLE (paid, professional-grade)
Choose a software that suits your needs, budget, and skill level.
Step 3: Create a Schematic in the PCB Design Software
Using your breadboard documentation as a reference, create a schematic of your circuit in the PCB design software. Ensure that all components are properly connected and that the schematic matches your breadboard design.
Step 4: Design the PCB Layout
With the schematic complete, you can now design the physical layout of your PCB. Consider factors such as component placement, trace routing, and board size. Aim to minimize the board size while maintaining proper spacing between components and traces.
Some key considerations when designing your PCB layout include:
- Component orientation and placement
- Trace width and spacing
- Ground planes and power distribution
- Mounting holes and mechanical constraints
- Silkscreen labels and markings
Step 5: Generate Gerber Files and Order PCBs
Once your PCB layout is complete, generate Gerber files, which are the industry-standard format for PCB manufacturing. Most PCB design software can export Gerber files directly.
Submit your Gerber files to a PCB manufacturing service. There are many online PCB fabrication services, such as JLCPCB, PCBWay, and OSH Park, that offer affordable and quick turnaround times for small-batch PCB orders.
Step 6: Assemble and Test Your PCB
Upon receiving your manufactured PCBs, carefully assemble the components onto the board. If you are not comfortable with soldering, consider using a PCB Assembly service or seeking help from an experienced technician.
After assembly, thoroughly test your PCB to ensure it functions as intended. Verify that all connections are secure and that the board performs as expected based on your breadboard prototype.

Tips for Successful Breadboard-to-PCB Transition
- Double-check your schematic and PCB layout for errors before ordering boards.
- Start with a small batch of PCBs to verify your design before committing to a larger production run.
- Consider the end-use environment of your PCB and choose appropriate components and materials.
- Use consistent naming conventions and clear labeling to make assembly and debugging easier.
- Test your PCB thoroughly and iterate on the design if necessary.
Frequently Asked Questions (FAQ)
1. Can I design a PCB without using a breadboard prototype first?
While it’s possible to design a PCB without first prototyping on a breadboard, it’s generally recommended to start with a breadboard to validate your circuit design and catch any issues early in the development process.
2. How much does it cost to manufacture PCBs?
The cost of manufacturing PCBs varies depending on factors such as the size of the board, the number of layers, the quantity ordered, and the chosen manufacturing service. Small-batch PCB orders can cost anywhere from a few dollars to a few hundred dollars.
3. What if I’m not comfortable with soldering?
If you’re not comfortable with soldering, you can opt for a PCB assembly service that will populate your board with components for an additional fee. Alternatively, you can seek help from an experienced technician or learn soldering skills through online tutorials and practice.
4. How long does it take to receive manufactured PCBs?
The turnaround time for PCB manufacturing varies depending on the service provider and your location. Typically, small-batch PCB orders can be delivered within 1-2 weeks, although expedited options may be available for an additional cost.
5. Can I sell my PCB design as a product?
Yes, you can sell your PCB design as a product. However, ensure that you have the necessary rights to any components, libraries, or design elements used in your project. Additionally, consider protecting your intellectual property through patents, trademarks, or copyrights as appropriate.
Conclusion
Transitioning from a breadboard prototype to a PCB is an essential step in bringing your electronics project to life. By following the steps outlined in this guide and considering the tips provided, you can successfully convert your breadboard design into a professional-grade PCB product. Remember to carefully plan your design, choose appropriate tools and components, and test your PCB thoroughly to ensure a successful outcome.

No responses yet