Introduction to PCB Prototypes
Printed Circuit Board (PCB) prototypes are essential for testing and validating electronic designs before mass production. They allow engineers and designers to verify the functionality, performance, and reliability of their circuits in real-world conditions. In this article, we will explore the process of manufacturing and assembling PCB prototypes, focusing on the popular 3+3 configuration.
What are PCB Prototypes?
PCB prototypes are small-scale, functional versions of a final printed circuit board design. They are used to test and validate the design before committing to large-scale production. Prototypes help identify any issues or improvements needed in the circuit design, component placement, and overall functionality.
Why are PCB Prototypes Important?
PCB prototypes play a crucial role in the electronics design process for several reasons:
-
Design Validation: Prototypes allow designers to test their circuits in real-world conditions, ensuring that the design works as intended.
-
Error Detection: Building prototypes helps identify any errors or issues in the design, such as incorrect component placement or routing problems.
-
Performance Optimization: By testing prototypes, designers can optimize the circuit’s performance, power consumption, and other characteristics.
-
Cost Savings: Identifying and fixing issues during the prototyping phase can save significant costs compared to discovering problems during mass production.
The 3+3 PCB Prototype Configuration
The 3+3 PCB prototype configuration refers to the number of layers and the copper thickness used in the PCB stack-up. In this configuration, the PCB consists of three layers with a copper thickness of 3 ounces per square foot (oz/ft²).
Understanding PCB Layers
A PCB layer is a thin, insulating material with copper traces etched onto one or both sides. The number of layers in a PCB depends on the complexity of the circuit and the desired functionality. In a 3+3 configuration, the PCB has three layers:
-
Top Layer: The top layer contains components and copper traces that connect them.
-
Inner Layer: The inner layer, also known as the core layer, is sandwiched between the top and bottom layers. It typically contains power and ground planes.
-
Bottom Layer: The bottom layer also contains components and copper traces.
Copper Thickness
Copper thickness refers to the amount of copper deposited on each layer of the PCB. In a 3+3 configuration, the copper thickness is 3 oz/ft². This thickness provides several benefits:
-
Current Carrying Capacity: Thicker copper traces can carry more current, making the PCB suitable for high-power applications.
-
Heat Dissipation: Thicker copper helps dissipate heat more effectively, preventing components from overheating.
-
Mechanical Strength: The increased copper thickness provides better mechanical strength and durability to the PCB.
| Layer | Copper Thickness (oz/ft²) |
|---|---|
| Top Layer | 3 |
| Inner Layer | 3 |
| Bottom Layer | 3 |

Manufacturing PCB Prototypes
The manufacturing process for PCB prototypes involves several steps, each crucial for ensuring the quality and functionality of the final product.
Step 1: PCB Design
The first step in manufacturing PCB prototypes is designing the circuit using specialized software, such as Altium Designer or KiCad. The design includes schematic capture, component placement, and PCB layout.
Step 2: Gerber File Generation
Once the PCB design is complete, the next step is to generate Gerber files. Gerber files are industry-standard file formats that contain all the necessary information for manufacturing the PCB, including copper traces, drill holes, and solder mask layers.
Step 3: PCB Fabrication
The PCB fabrication process begins with printing the circuit pattern onto a copper-clad laminate using a photoresist process. The exposed copper is then etched away, leaving only the desired traces. This process is repeated for each layer of the PCB.
Step 4: Drilling and Plating
After etching, holes are drilled through the PCB to accommodate through-hole components and vias. These holes are then plated with copper to ensure electrical connectivity between layers.
Step 5: Solder Mask Application
A solder mask, typically green in color, is applied to the PCB to protect the copper traces from oxidation and prevent solder bridges during assembly. The solder mask also provides insulation between adjacent traces.
Step 6: Silkscreen Printing
The final step in PCB fabrication is silkscreen printing. This process involves printing text, logos, and component identifiers onto the PCB surface for easier assembly and troubleshooting.

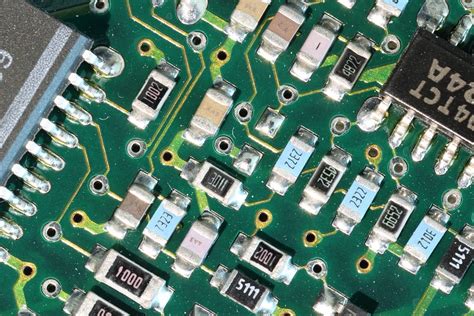
Assembling PCB Prototypes
Once the PCB fabrication is complete, the next step is to assemble the components onto the board. PCB Assembly can be done manually or using automated equipment, depending on the complexity of the design and the number of prototypes required.
Step 1: Solder Paste Application
Solder paste, a mixture of tiny solder particles and flux, is applied to the PCB pads using a stencil or syringe. The solder paste holds the components in place during the reflow process.
Step 2: Component Placement
Components are placed onto the PCB, either manually or using a pick-and-place machine. Proper alignment and orientation are crucial for ensuring the correct functioning of the circuit.
Step 3: Reflow Soldering
The PCB with placed components is then sent through a reflow oven. The oven heats the board, melting the solder paste and creating a permanent electrical and mechanical connection between the components and the PCB.
Step 4: Inspection and Testing
After the reflow process, the assembled PCB prototypes undergo visual inspection and electrical testing to ensure proper functionality and identify any defects or issues.

Advantages of 3+3 PCB Prototypes
The 3+3 PCB prototype configuration offers several advantages over other configurations:
-
Increased Current Carrying Capacity: The thicker copper traces in a 3+3 PCB allow for higher current carrying capacity, making it suitable for power-hungry applications.
-
Better Heat Dissipation: The increased copper thickness helps dissipate heat more effectively, reducing the risk of component overheating and failure.
-
Improved Signal Integrity: The inner layer in a 3+3 PCB provides a low-impedance path for power and ground distribution, minimizing noise and improving signal integrity.
-
Enhanced Mechanical Strength: The thicker copper and additional layer provide better mechanical strength and durability to the PCB, reducing the risk of damage during handling and assembly.
Challenges in 3+3 PCB Prototype Manufacturing and Assembly
While 3+3 PCB prototypes offer numerous benefits, there are also some challenges associated with their manufacturing and assembly:
-
Increased Cost: The additional layer and thicker copper in a 3+3 PCB can increase the manufacturing cost compared to simpler configurations.
-
Longer Lead Times: The more complex manufacturing process for 3+3 PCBs may result in longer lead times compared to simpler designs.
-
Assembly Challenges: The thicker PCB and increased copper weight can pose challenges during assembly, requiring specialized equipment and expertise.
Frequently Asked Questions (FAQ)
-
Q: How long does it take to manufacture and assemble a 3+3 PCB prototype?
A: The lead time for manufacturing and assembling a 3+3 PCB prototype can vary depending on the complexity of the design and the workload of the manufacturing facility. Typically, it can take anywhere from a few days to a couple of weeks. -
Q: Can I order just one or two 3+3 PCB prototypes for testing?
A: Yes, most PCB manufacturing services offer low-volume prototype runs, allowing you to order just a few boards for testing and validation. -
Q: Are 3+3 PCB prototypes suitable for all applications?
A: 3+3 PCB prototypes are particularly well-suited for applications that require high current carrying capacity, better heat dissipation, and improved signal integrity. However, for simpler designs or cost-sensitive projects, other configurations may be more appropriate. -
Q: What files do I need to provide to the manufacturer for 3+3 PCB prototype fabrication?
A: To fabricate your 3+3 PCB prototypes, you will need to provide Gerber files, which include information about the copper traces, drill holes, and solder mask layers. Additionally, you may need to provide assembly files, such as a bill of materials (BOM) and pick-and-place files, for the assembly process. -
Q: Can I specify custom requirements for my 3+3 PCB prototypes, such as specific materials or surface finishes?
A: Most PCB manufacturing services offer a range of customization options, including different materials, surface finishes, and Solder Mask Colors. You can discuss your specific requirements with the manufacturer to ensure that your 3+3 PCB prototypes meet your needs.
Conclusion
PCB prototypes play a vital role in the electronics design process, allowing designers to test and validate their circuits before committing to large-scale production. The 3+3 PCB prototype configuration, with its three layers and 3 oz/ft² copper thickness, offers numerous benefits, including increased current carrying capacity, better heat dissipation, and improved signal integrity.
However, manufacturing and assembling 3+3 PCB prototypes also present some challenges, such as increased costs and longer lead times compared to simpler configurations. By understanding the advantages and limitations of 3+3 PCB prototypes, designers can make informed decisions about whether this configuration is suitable for their specific application.
When working with a PCB manufacturing service to produce 3+3 PCB prototypes, it is essential to provide accurate and complete design files, including Gerber files and assembly information. By collaborating closely with the manufacturer and clearly communicating your requirements, you can ensure that your PCB prototypes are fabricated and assembled to your specifications, enabling you to test and validate your designs with confidence.
No responses yet