Introduction
Printed Circuit Board (PCB) assembly documentation is a critical aspect of the PCB manufacturing process. It provides a clear and concise guide for the assembly team to follow, ensuring that the final product meets the required specifications and functions as intended. Proper documentation can help to reduce errors, improve efficiency, and ultimately save time and money.
In this article, we will discuss seven tips to help you prepare effective PCB assembly documentation. By following these tips, you can ensure that your documentation is clear, comprehensive, and easy to understand.
Tip 1: Start with a Clear and Concise Bill of Materials (BOM)
What is a Bill of Materials?
A Bill of Materials (BOM) is a comprehensive list of all the components required to assemble a PCB. It includes the part number, description, quantity, and supplier for each component. The BOM is a critical document that the assembly team uses to ensure that all the necessary components are available and accounted for before the assembly process begins.
Why is a Clear and Concise BOM Important?
A clear and concise BOM is essential for several reasons:
- It helps to ensure that all the necessary components are available before the assembly process begins, reducing the risk of delays or errors.
- It provides a clear and accurate reference for the assembly team to follow, reducing the risk of errors or confusion.
- It helps to streamline the purchasing process by providing a clear list of the components required and their suppliers.
Tips for Creating a Clear and Concise BOM
- Use a consistent format: Use a standard format for your BOM, such as a spreadsheet or table, to ensure that all the necessary information is included and easy to read.
- Include all necessary information: Make sure to include all the necessary information for each component, including the part number, description, quantity, and supplier.
- Use clear and concise language: Use clear and concise language to describe each component, avoiding technical jargon or abbreviations that may be confusing to the assembly team.
- Double-check for accuracy: Double-check your BOM for accuracy, ensuring that all the necessary components are included and that the quantities and part numbers are correct.
| Component | Part Number | Description | Quantity | Supplier |
|---|---|---|---|---|
| Resistor | ABC123 | 10K Ohm | 100 | XYZ Inc. |
| Capacitor | DEF456 | 10uF | 50 | QRS Co. |
| IC | GHI789 | ATmega328P | 10 | MNO Ltd. |

Tip 2: Provide Clear and Detailed Assembly Instructions
What are Assembly Instructions?
Assembly instructions are a step-by-step guide that the assembly team follows to assemble the PCB. They include information on how to place and orient each component on the board, as well as any special instructions or precautions that need to be taken during the assembly process.
Why are Clear and Detailed Assembly Instructions Important?
Clear and detailed assembly instructions are essential for several reasons:
- They provide a clear and concise guide for the assembly team to follow, reducing the risk of errors or confusion.
- They help to ensure that the final product meets the required specifications and functions as intended.
- They can help to improve efficiency and reduce the time required for assembly by providing clear and detailed instructions.
Tips for Providing Clear and Detailed Assembly Instructions
- Use clear and concise language: Use clear and concise language to describe each step of the assembly process, avoiding technical jargon or abbreviations that may be confusing to the assembly team.
- Use visuals: Use visuals, such as diagrams or photographs, to illustrate each step of the assembly process and make the instructions easier to follow.
- Provide special instructions: Provide any special instructions or precautions that need to be taken during the assembly process, such as handling sensitive components or using specific tools.
- Test the instructions: Test the assembly instructions by having someone unfamiliar with the process follow them to ensure that they are clear and easy to understand.

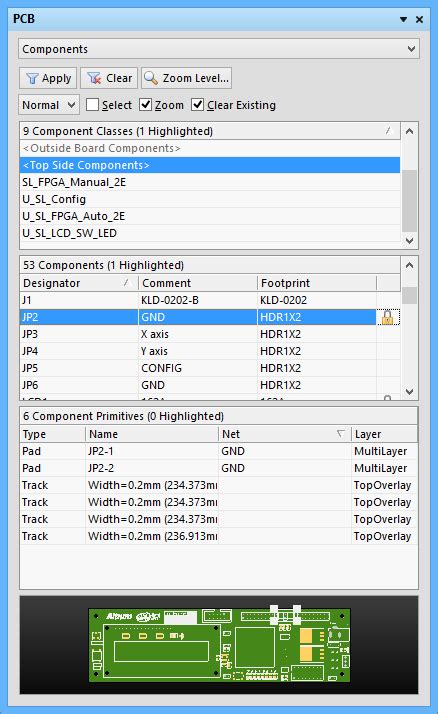
Tip 3: Include Detailed Schematics and Diagrams
What are Schematics and Diagrams?
Schematics and diagrams are visual representations of the PCB design that show the interconnections between components and the overall layout of the board. They provide a clear and concise reference for the assembly team to follow and can help to reduce errors and improve efficiency.
Why are Detailed Schematics and Diagrams Important?
Detailed schematics and diagrams are important for several reasons:
- They provide a clear and concise reference for the assembly team to follow, reducing the risk of errors or confusion.
- They can help to identify potential issues or conflicts in the PCB design before the assembly process begins, reducing the risk of delays or rework.
- They can help to streamline the troubleshooting process by providing a clear visual reference of the PCB design.
Tips for Including Detailed Schematics and Diagrams
- Use a consistent format: Use a standard format for your schematics and diagrams, such as a PDF or CAD file, to ensure that they are easy to read and understand.
- Include all necessary information: Make sure to include all the necessary information in your schematics and diagrams, such as component values, pin assignments, and interconnections.
- Use clear and concise labeling: Use clear and concise labeling to identify each component and interconnection in your schematics and diagrams, avoiding technical jargon or abbreviations that may be confusing to the assembly team.
- Provide multiple views: Provide multiple views of the PCB design, such as top and bottom views, to ensure that the assembly team has a clear understanding of the overall layout of the board.

Tip 4: Specify Testing and Quality Control Procedures
What are Testing and Quality Control Procedures?
Testing and quality control procedures are the steps taken to ensure that the assembled PCB meets the required specifications and functions as intended. They can include visual inspections, electrical tests, and functional tests to verify that the board is free of defects and performs as expected.
Why are Specified Testing and Quality Control Procedures Important?
Specified testing and quality control procedures are important for several reasons:
- They help to ensure that the final product meets the required specifications and functions as intended, reducing the risk of defects or failures.
- They can help to identify potential issues or defects early in the assembly process, reducing the risk of delays or rework.
- They provide a clear and concise guide for the quality control team to follow, ensuring that all necessary tests and inspections are performed consistently and accurately.
Tips for Specifying Testing and Quality Control Procedures
- Define acceptance criteria: Define clear and measurable acceptance criteria for each test and inspection, such as minimum and maximum voltage levels or visual inspection criteria.
- Specify test equipment: Specify the test equipment and tools required for each test and inspection, such as multimeters, oscilloscopes, or magnifying glasses.
- Provide detailed instructions: Provide detailed instructions for each test and inspection, including the steps to be followed, the data to be recorded, and any special precautions or considerations.
- Include documentation requirements: Include documentation requirements for each test and inspection, such as test reports or inspection logs, to ensure that the results are recorded and tracked consistently.
| Test/Inspection | Acceptance Criteria | Test Equipment | Instructions |
|---|---|---|---|
| Visual Inspection | No visible defects or damage | Magnifying glass | Inspect board for defects or damage, record results |
| Continuity Test | Resistance < 0.5 ohms | Multimeter | Measure resistance between specified points, record results |
| Functional Test | Outputs within specified range | Oscilloscope | Apply specified inputs, measure outputs, record results |
Tip 5: Use Version Control and Change Management
What is Version Control and Change Management?
Version control and change management are the processes used to track and manage changes to the PCB design and documentation over time. They help to ensure that all stakeholders are working with the most up-to-date version of the design and documentation, and that any changes are properly documented and communicated.
Why is Version Control and Change Management Important?
Version control and change management are important for several reasons:
- They help to ensure that all stakeholders are working with the most up-to-date version of the design and documentation, reducing the risk of errors or confusion.
- They provide a clear and concise record of all changes made to the design and documentation over time, making it easier to track and manage revisions.
- They can help to streamline the communication process by providing a central repository for all design and documentation files, reducing the risk of miscommunication or lost information.
Tips for Using Version Control and Change Management
- Use a version control system: Use a version control system, such as Git or SVN, to track and manage changes to the PCB design and documentation files.
- Establish a naming convention: Establish a clear and consistent naming convention for all design and documentation files, such as using a version number or date in the file name.
- Document all changes: Document all changes made to the design and documentation, including the reason for the change, the date, and the person responsible.
- Communicate changes: Communicate all changes to the design and documentation to all stakeholders, using a clear and concise format such as a change log or release notes.
Tip 6: Provide Comprehensive Training and Support
What is Training and Support?
Training and support are the processes used to ensure that the assembly team has the knowledge and skills required to assemble the PCB correctly and efficiently. They can include in-person or online training sessions, documentation and guides, and ongoing support and troubleshooting assistance.
Why is Comprehensive Training and Support Important?
Comprehensive training and support are important for several reasons:
- They help to ensure that the assembly team has the knowledge and skills required to assemble the PCB correctly and efficiently, reducing the risk of errors or delays.
- They can help to improve the overall quality of the final product by ensuring that the assembly team follows best practices and procedures.
- They provide a clear and concise resource for the assembly team to refer to if they encounter any issues or questions during the assembly process.
Tips for Providing Comprehensive Training and Support
- Develop a training program: Develop a comprehensive training program that covers all aspects of the PCB assembly process, including component placement, soldering techniques, and testing procedures.
- Provide documentation and guides: Provide clear and concise documentation and guides that the assembly team can refer to during the assembly process, such as assembly instructions, schematics, and troubleshooting guides.
- Offer ongoing support: Offer ongoing support and troubleshooting assistance to the assembly team, such as a dedicated support line or email address, to ensure that any issues or questions are addressed quickly and efficiently.
- Encourage feedback: Encourage feedback from the assembly team on the training and support provided, and use this feedback to continuously improve and refine the process.
Tip 7: Continuously Review and Improve Documentation
Why is Continuous Review and Improvement Important?
Continuous review and improvement of PCB assembly documentation are important for several reasons:
- They help to ensure that the documentation remains accurate and up-to-date, reflecting any changes or improvements made to the PCB design or assembly process over time.
- They can help to identify potential areas for improvement or optimization in the assembly process, leading to increased efficiency and quality.
- They provide an opportunity to incorporate feedback and suggestions from the assembly team and other stakeholders, ensuring that the documentation meets the needs of all users.
Tips for Continuously Reviewing and Improving Documentation
- Establish a review schedule: Establish a regular review schedule for all PCB assembly documentation, such as quarterly or annually, to ensure that it remains accurate and up-to-date.
- Solicit feedback: Solicit feedback from the assembly team and other stakeholders on the effectiveness and usability of the documentation, and use this feedback to identify areas for improvement.
- Incorporate changes and updates: Incorporate any changes or updates to the PCB design or assembly process into the documentation in a timely manner, using version control and change management processes to ensure that all stakeholders are working with the most up-to-date information.
- Conduct audits and assessments: Conduct regular audits and assessments of the PCB assembly process to identify potential areas for improvement or optimization, and use this information to update and refine the documentation as needed.
Frequently Asked Questions (FAQ)
1. What is the purpose of PCB assembly documentation?
PCB assembly documentation provides a clear and concise guide for the assembly team to follow, ensuring that the final product meets the required specifications and functions as intended. It includes information such as the bill of materials, assembly instructions, schematics and diagrams, testing and quality control procedures, and more.
2. Why is a clear and concise bill of materials important?
A clear and concise bill of materials (BOM) is important because it helps to ensure that all the necessary components are available before the assembly process begins, reducing the risk of delays or errors. It also provides a clear and accurate reference for the assembly team to follow, and helps to streamline the purchasing process by providing a clear list of the components required and their suppliers.
3. What should be included in assembly instructions?
Assembly instructions should include a step-by-step guide that the assembly team follows to assemble the PCB, including information on how to place and orient each component on the board, as well as any special instructions or precautions that need to be taken during the assembly process. They should use clear and concise language, visuals such as diagrams or photographs, and be tested to ensure that they are easy to understand.
4. Why are detailed schematics and diagrams important?
Detailed schematics and diagrams are important because they provide a clear and concise reference for the assembly team to follow, reducing the risk of errors or confusion. They can help to identify potential issues or conflicts in the PCB design before the assembly process begins, and can help to streamline the troubleshooting process by providing a clear visual reference of the PCB design.
5. What are some tips for continuously reviewing and improving PCB assembly documentation?
Some tips for continuously reviewing and improving PCB assembly documentation include establishing a regular review schedule, soliciting feedback from the assembly team and other stakeholders, incorporating changes and updates in a timely manner using version control and change management processes, and conducting regular audits and assessments of the PCB assembly process to identify potential areas for improvement or optimization.
Conclusion
Preparing effective PCB assembly documentation is critical to ensuring that the final product meets the required specifications and functions as intended. By following the seven tips outlined in this article, including starting with a clear and concise bill of materials, providing clear and detailed assembly instructions, including detailed schematics and diagrams, specifying testing and quality control procedures, using version control and change management, providing comprehensive training and support, and continuously reviewing and improving documentation, you can help to reduce errors, improve efficiency, and ultimately save time and money in the PCB assembly process. By investing in comprehensive and accurate documentation, you can ensure that your PCBs are assembled correctly and efficiently, leading to a high-quality final product.
No responses yet