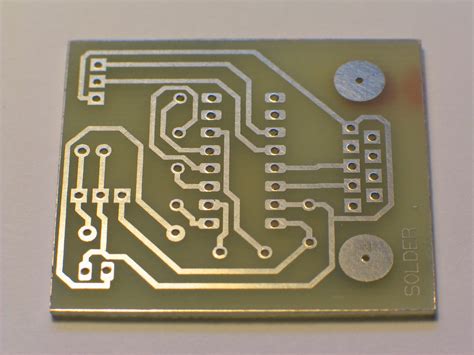
What is a 60% Keyboard PCB?
A 60% keyboard PCB is a compact circuit board designed for 60% layout mechanical keyboards. These smaller form factor boards omit the numpad, function row, and some navigation keys compared to a full-size keyboard. The 60% size strikes a balance between space savings and functionality.
Some key features of a typical 60% PCB include:
- Support for a 61-64 key layout
- USB-C connector
- QMK or VIA firmware compatibility
- In-switch LED support
- Hotswap switch sockets (on some PCBs)
Tools and Materials Needed
Before getting started, gather the following tools and components:
- 60% keyboard PCB Kit
- Soldering iron and solder
- Flush cutters
- Tweezers
- Multimeter
- Stabilizers
- Mechanical switches (MX style)
- USB-C cable
- Case and plate
Choosing a 60% PCB Kit
When selecting a PCB kit, consider factors like layout options, RGB lighting, hotswap support, and QMK/VIA compatibility. Some popular 60% PCB kits include:
| PCB Kit | Layout | Hotswap | Lighting | Firmware |
|---|---|---|---|---|
| DZ60 | Multiple | Yes | RGB underglow | QMK |
| 1UP RGB 60 | ANSI | Yes | Per-key RGB | QMK |
| GH60 | Multiple | No | In-switch LEDs | QMK |

Step 1: Test the PCB
Before soldering anything, it’s crucial to test the PCB for any defects or shorts. Follow these steps:
- Visually inspect the PCB for any obvious damage or missing components.
- With a multimeter in continuity mode, test for shorts between the power (VCC) and ground (GND) pins.
- Test each switch position for continuity between the row and column pads.
If any issues are found, reach out to the PCB vendor for a replacement or troubleshooting assistance.

Step 2: Solder Stabilizers
Most 60% layouts require stabilizers for the larger modifier keys. The two main types are plate-mounted (clips into the plate) and PCB-mounted (solders onto the PCB). If using PCB-mount stabs:
- Insert the stabilizer wire into the stabilizer housing before installing.
- Snap the stabilizers into the PCB cutouts, ensuring they’re oriented correctly.
- Solder the stabilizer legs to the PCB pads.
- Clip the excess leg length with flush cutters.

Step 3: Solder Switches
With the stabilizers in place, it’s time to solder the switches:
- Insert switches into the plate and PCB, verifying they’re snapped in and aligned.
- Solder each switch pin to its corresponding pad on the PCB.
- Ensure the solder joints are clean and completely filled.
- Repeat for each switch until the keyboard is fully populated.
If using hotswap sockets, simply solder those to the PCB instead for a solderless build.
Step 4: Flash the Firmware
Most custom 60% PCBs use QMK or VIA firmware, which enables full programmability. Here’s a basic QMK flashing process:
- Download and install QMK Toolbox.
- Plug in the keyboard while holding the reset button (or use the reset keycode if programmed).
- Load the correct firmware .hex file in QMK Toolbox.
- Click “Flash” and wait for the process to complete.
- Test each key to verify proper functionality.
Consult the QMK documentation for more detailed flashing instructions and customization options.
Step 5: Final Assembly
With the PCB assembled and firmware flashed, finish assembling the keyboard:
- Mount the PCB and plate assembly into the case.
- Secure the assembly with the provided screws.
- Attach rubber feet to the case bottom.
- Connect the USB-C cable and test the keyboard.
Congratulations – you’ve now built a fully custom 60% mechanical keyboard!
Frequently Asked Questions
1. What if I’ve never soldered before?
Soldering may seem intimidating, but it’s a skill that can be learned with practice. Consider getting a soldering practice kit and watching tutorial videos before attempting the full keyboard PCB. Take it slow and ensure each joint is solid before moving on.
2. Are 60% keyboards viable for gaming?
Yes, many gamers prefer 60% keyboards for their compact size and extra desk space for mouse movement. The smaller form factor doesn’t hinder performance in most games. However, some titles may benefit from a larger layout with dedicated function or macro keys.
3. Can I install LEDs on a PCB without built-in lighting?
It depends on the specific PCB. Some boards support in-switch LEDs even without onboard RGB lighting. You would need to solder the LED legs to the pads for each switch. However, many newer PCBs have SMD RGB LEDs pre-installed for easier backlighting.
4. What’s the difference between plate-mount and PCB-mount switches?
Plate-mount switches snap into a metal mounting plate which is then attached to the PCB. They have no extra plastic legs. PCB-mount switches can snap directly into the PCB without a plate, and have two extra plastic pins for added stability. Both types are compatible with most 60% PCBs.
5. How do I customize the keyboard layout and function layers?
Customizing the layout and programming function layers requires editing the keyboard’s firmware, usually in QMK or VIA. You can use their online configurators to visually map out your desired key placements and settings. Consult the firmware documentation for more advanced customization options.
Building a 60% keyboard PCB is an involving but rewarding project. With some patience, soldering skills, and the right components, you’ll have a personalized compact keyboard tailored to your needs. Happy building!
No responses yet