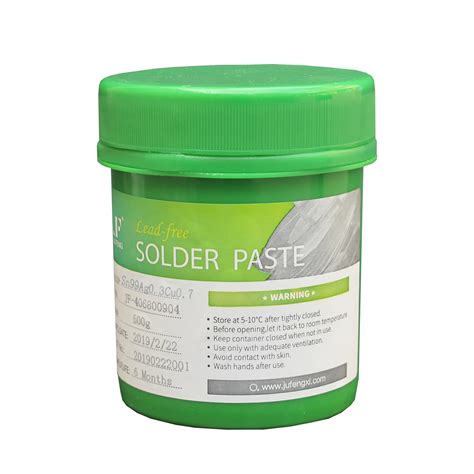
Introduction to Solder Paste
Solder paste is a crucial component in the electronics assembly process, serving as the binding material that connects Electronic Components to printed Circuit Boards (PCBs). It is a mixture of tiny solder particles suspended in a flux medium, which helps to remove oxides and impurities from the metal surfaces during the soldering process. Choosing the right solder paste, storing it properly, and using it effectively are essential for achieving reliable and high-quality solder joints in electronic assemblies.
Choosing the Right Solder Paste
Alloy Composition
The first factor to consider when selecting a solder paste is the alloy composition. The most common solder alloys used in electronics assembly are:
| Alloy | Composition | Melting Point (°C) |
|---|---|---|
| Sn63/Pb37 | 63% Tin, 37% Lead | 183 |
| Sn96.5/Ag3.0/Cu0.5 | 96.5% Tin, 3% Silver, 0.5% Copper | 217-220 |
| Sn42/Bi58 | 42% Tin, 58% Bismuth | 138 |
The choice of alloy depends on the specific application requirements, such as melting temperature, mechanical strength, and environmental considerations (e.g., lead-free regulations).
Particle Size
Solder paste is classified by its particle size, which is determined by the mesh size used to sieve the solder particles. Common particle sizes include:
- Type 3 (25-45 μm)
- Type 4 (20-38 μm)
- Type 5 (15-25 μm)
- Type 6 (5-15 μm)
Smaller particle sizes are generally used for fine-pitch components and high-density assemblies, while larger particle sizes are suitable for larger components and lower-density assemblies.
Flux Type
The flux in solder paste serves to remove oxides and improve wetting during the soldering process. There are three main types of flux:
- Rosin (RO): Mild activity, suitable for clean surfaces
- Rosin Mildly Activated (RMA): Moderate activity, good for most applications
- Water-Soluble (WS): High activity, easily cleaned with water
The choice of flux depends on the cleanliness of the surfaces to be soldered, the required cleaning process, and the environmental conditions during and after assembly.

Storing Solder Paste
Proper storage of solder paste is critical to maintaining its quality and performance. Follow these guidelines to ensure optimal storage:
Temperature Control
Solder paste should be stored at a controlled temperature, typically between 0°C and 10°C (32°F to 50°F). This helps to prevent the separation of solder particles and flux medium and slows down the degradation of the flux.
Humidity Control
High humidity can cause the solder paste to absorb moisture, leading to splattering and poor wetting during the soldering process. Store solder paste in a low-humidity environment, ideally below 30% relative humidity.
Shelf Life
Solder paste has a limited shelf life, which varies depending on the specific product and storage conditions. Typically, solder paste can be stored for 6 to 12 months when kept at the recommended temperature and humidity levels. Always check the manufacturer’s guidelines and use the paste before its expiration date.

Using Solder Paste
Printing
Solder paste is typically applied to the PCB using a stencil printing process. The stencil, which is a thin metal sheet with apertures that match the pads on the PCB, is aligned with the board. Solder paste is then dispersed over the stencil, filling the apertures and depositing the paste onto the pads.
To achieve optimal printing results, consider the following factors:
- Stencil thickness: Choose a stencil thickness that matches the solder paste particle size and the required deposit volume.
- Aperture design: Ensure that the stencil apertures are properly sized and shaped to accommodate the solder paste and the component leads.
- Printer settings: Adjust the printer parameters, such as squeegee pressure, speed, and separation distance, to achieve consistent and uniform paste deposits.
Component Placement
After printing the solder paste, the electronic components are placed onto the pads. This can be done manually for low-volume or prototype assemblies or using automated pick-and-place machines for high-volume production.
Ensure that the components are accurately positioned and in good contact with the solder paste. Misalignment or poor contact can lead to open or short circuits after reflow.
Reflow Soldering
Once the components are placed, the assembly undergoes a reflow soldering process. This involves heating the assembly in a controlled manner to melt the solder particles and form a strong metallurgical bond between the components and the PCB.
A typical reflow profile consists of four stages:
- Preheat: Gradually heating the assembly to activate the flux and evaporate solvents
- Soak: Maintaining a stable temperature to allow the components and board to reach thermal equilibrium
- Reflow: Rapidly heating the assembly above the solder’s melting point to form the solder joints
- Cooling: Gradually cooling the assembly to solidify the solder and minimize thermal stress
Optimize the reflow profile based on the specific solder paste, components, and PCB characteristics to ensure proper solder joint formation and minimize defects such as voiding, bridging, or tombstoning.
Inspection and Rework
After reflow, inspect the assembly for any solder joint defects or component misalignment. Common inspection methods include:
- Visual inspection: Manually inspecting the solder joints using a microscope or magnifying glass
- Automated Optical Inspection (AOI): Using machine vision systems to detect defects
- X-ray inspection: Examining hidden or obscured solder joints using X-ray imaging
If defects are found, perform necessary rework using appropriate tools and techniques, such as desoldering, component replacement, and localized reflow.

Frequently Asked Questions (FAQ)
-
Q: What happens if I use expired solder paste?
A: Using expired solder paste can lead to poor wetting, solder joint defects, and reduced reliability. Always use solder paste within its specified shelf life and store it properly to maintain its quality. -
Q: Can I mix different types or brands of solder paste?
A: Mixing different types or brands of solder paste is not recommended, as they may have different alloy compositions, flux chemistries, or rheological properties. Stick to a single type and brand of solder paste for consistent results. -
Q: How do I determine the right amount of solder paste to apply?
A: The amount of solder paste depends on the pad size, component type, and desired solder joint profile. Stencil thickness, aperture design, and print parameters can be adjusted to achieve the optimal solder paste volume. Consult with your solder paste supplier or assembly process engineer for specific guidelines. -
Q: What should I do if the solder paste is not printing properly?
A: If you encounter issues with solder paste printing, such as inconsistent deposits or stencil clogging, check the following: - Solder paste condition: Ensure the paste is within its shelf life and has been stored properly
- Stencil condition: Clean the stencil and check for damage or wear
- Printer settings: Adjust the squeegee pressure, speed, and separation distance
-
Environmental conditions: Ensure the room temperature and humidity are within the recommended range
-
Q: How do I clean flux residue after soldering?
A: The cleaning method depends on the type of flux used: - Rosin (RO) and Rosin Mildly Activated (RMA) fluxes: Clean with isopropyl alcohol or specialized flux cleaners
- Water-Soluble (WS) fluxes: Clean with deionized water or a mild detergent solution
Always follow the manufacturer’s guidelines and ensure that the cleaning process does not damage the components or the PCB.
Conclusion
Selecting the appropriate solder paste, storing it correctly, and using it effectively are key factors in achieving high-quality and reliable solder joints in electronics assembly. By understanding the properties of solder paste, such as alloy composition, particle size, and flux type, you can choose the right paste for your specific application.
Proper storage, with controlled temperature and humidity, ensures that the solder paste maintains its quality and performance throughout its shelf life. When using solder paste, optimize the printing process, component placement, and reflow profile to minimize defects and achieve consistent results.
Regular inspection and rework, when necessary, help to identify and correct any issues in the assembly process. By following best practices and continuously improving your solder paste selection, storage, and use, you can produce high-quality electronic assemblies with reliable solder joints.
No responses yet